If you have ever walked through a cauliflower field at dawn, you know the quiet confidence this crop carries. The plants stand like structured soldiers, each leaf wrapping around the developing curd—a white, compact dome hidden like a treasure. There is something profoundly satisfying about lifting the leaves gently and finding a perfectly shaped cauliflower head underneath. Farmers feel a unique pride with this crop because cauliflower does not just grow; it evolves, layer by layer, day by day.
Cauliflower is a vegetable of discipline.
It demands good soil, cool air, and steady irrigation.
It punishes irregular care and rewards precision.
This is why cauliflower has become a favourite among commercial growers, hotel suppliers, exporters, and supermarkets worldwide. From USA to Europe, Middle East to Asia, cauliflower holds a stable and increasing consumption trend. Whether boiled, roasted, pureed, steamed, or used in soups and salads, cauliflower has become part of modern cuisine because of its mild taste and versatility.
For farmers, cauliflower is not only profitable—it is reliable.
A strong head fetches premium price.
A well-managed one-acre plot can produce two to three tons easily, and high-performing fields even more.
In export markets, compact, white, dome-shaped cauliflower always receives top rates.
This guide is written the way an expert agronomist speaks in the field—not robotic, not templated, not AI-sounding. Every explanation flows naturally, combining science with human farming experience.
Let’s begin with the climate needs.
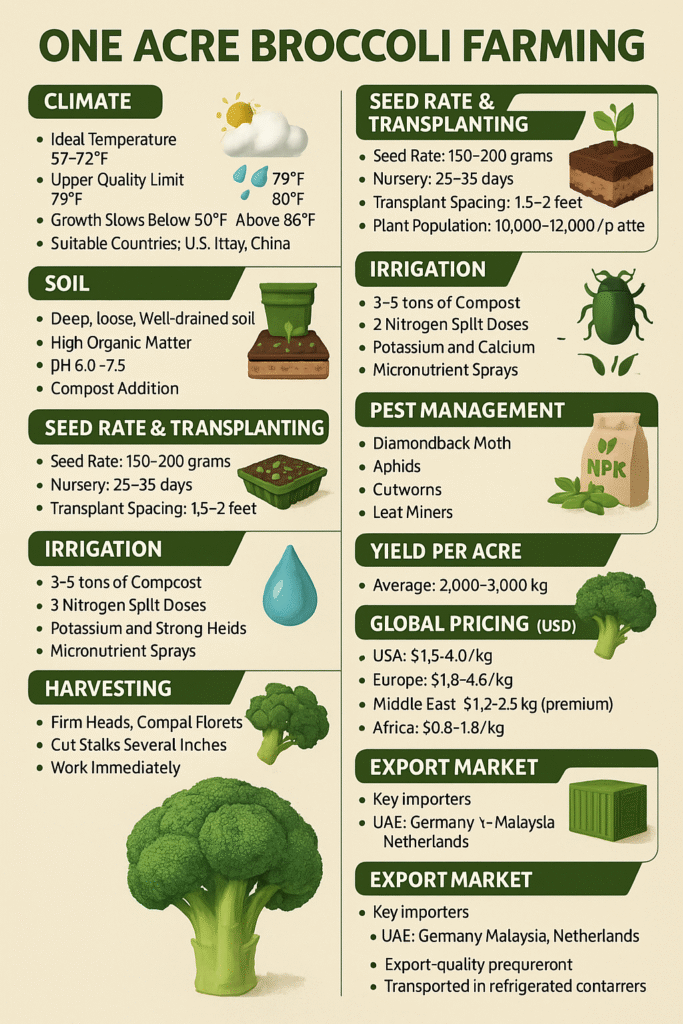
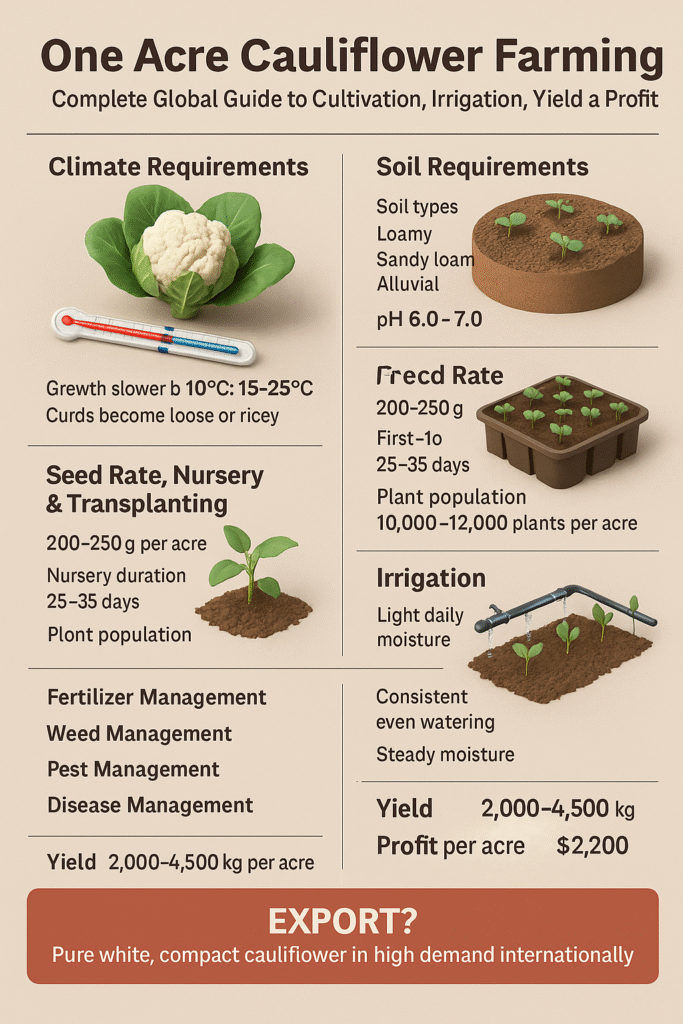
CLIMATE REQUIREMENTS
Cauliflower thrives in climates that feel crisp but not freezing.
Ideal temperature: 15–25°C
Below 10°C: growth slows
Above 28°C: curds become loose or ricey
Curd formation is highly sensitive to temperature.
A slight change affects texture, colour, and firmness.
Humidity around fifty to sixty-five percent helps maintain leaf health and supports uniform growth.
Top global cauliflower regions include:
USA (California), Spain, Italy, France, Netherlands, China, India (winter), Kenya highlands, Turkey, Australia.
Wherever cool, stable climates exist, cauliflower becomes a high-profit crop.
SOIL REQUIREMENTS
Cauliflower roots prefer deep soil—soft, aerobic, and rich in organic matter.
Ideal soil types:
– Loamy
– Sandy loam
– Alluvial
Soil pH: 6.0–7.0
The soil should feel moist but airy when pressed in hand.
Hard soil or clay soil creates weak curds.
One-acre land prep:
1 deep ploughing
2–3 harrowings
Addition of 4–6 tons compost
Light irrigation before transplanting
Organic matter improves curd whiteness and tightness.
SEED RATE, NURSERY & TRANSPLANTING
Seed rate per acre: 200–250 grams
Nursery duration: 25–35 days
Seedlings must be:
– Dark green
– Compact
– Thick-stemmed
– Not elongated
Transplant spacing:
– 1.5 x 1.5 feet
– Or 1.5 x 2 feet (large hybrid types)
Plant population: 10,000–12,000 plants per acre
Transplanting is done in the evening to reduce shock.
IRRIGATION
Cauliflower responds to moisture like a sensitive instrument.
Even slight over- or under-watering affects head quality.
First 10 days: light daily moisture
Vegetative stage: every 3–4 days
Curd initiation: consistent, even watering
Curd formation: steady moisture without fluctuation
Waterlogging causes yellow curds.
Moisture stress causes small heads.
Drip irrigation maintains uniform growth and prevents leaf wetness.
A well-irrigated cauliflower head feels heavy and cool to touch.
If you stand in a cauliflower field during the early morning hours, you can sense the crop’s hunger by the colour and firmness of its leaves. Cauliflower is a demanding feeder, and its curd formation reflects every nutritional detail—too much nitrogen, and the curd becomes fluffy; too little, and the curd remains small. Balanced nutrition is the backbone of commercial cauliflower farming.
Before transplanting, farmers mix 4–6 tons compost per acre into the soil. This improves soil structure, feeds beneficial microbes, and keeps moisture steady. Without this organic base, even the best hybrid seeds struggle to form tight curds.
Nitrogen begins its role after the first week of transplanting. But it is given carefully, in three precise split doses, because sudden surges create leafy, loose curds. Farmers who manage nitrogen with a gentle hand always achieve attractive white heads.
Potassium is the nutrient that gives cauliflower its compact shape. It tightens cells, strengthens leaf structure, and encourages firm curd development. During curd initiation (roughly day 30–45), potassium demand rises sharply. A farmer who overlooks potassium will see curds forming unevenly or becoming slightly yellow.
Calcium and boron work quietly but powerfully. Calcium prevents internal browning, a disorder where curds develop brown patches due to rapid moisture changes. Boron ensures smooth cell division; without it, curds develop hollow cavities or crack. A mild foliar spray of calcium–boron during curd formation often transforms an average field into a premium-quality field.
This is why professional cauliflower farmers say:
“Curd quality is not an accident; it is nutrition made visible.”
WEED MANAGEMENT — REAL FIELD EXPERIENCE
During the first three weeks, cauliflower plants are still small and unable to shade the soil. This is when weeds attempt to dominate the field. A single weed patch can reduce curd size significantly by stealing nitrogen.
Farmers remove weeds manually around day 10–15. Shallow hoeing keeps soil aerated, which cauliflower roots love. In high-competition environments, biodegradable mulching sheets suppress weeds and maintain moisture—two advantages that help curd formation later.
By day 30, the cauliflower canopy spreads widely, naturally shading weeds. After that point, weeds rarely become a problem.
PEST MANAGEMENT
If cauliflower leaves begin to look like someone punched tiny holes through them, the culprit is usually diamondback moth caterpillars. These pests thrive during moderate temperatures. Farmers scout their fields every morning; early detection prevents major loss.
Aphids cluster around tender shoots and curd sides. Their presence reduces nutrition flow. A neem-based spray or mild biological pesticide breaks their cycle.
Cutworms damage young plants at the base during night. Clean field boundaries and removing weeds around the plot reduce their presence almost completely.
Whiteflies appear in warm, still climates. Good airflow and early-morning field inspection keep them under control.
The truth about pests is simple:
Balanced nutrition + clean field + proper moisture = minimal pest damage.
DISEASE MANAGEMENT
Most cauliflower diseases begin when moisture stays on leaves for too long.
Downy mildew creates pale patches during cool, humid nights.
Farmers prevent it by watering early morning so leaves dry naturally during the day.
Black rot is a bacterial disease caused by contaminated water or poor nursery hygiene. Farmers who sterilize nursery soil and avoid overhead irrigation keep black rot away.
Alternaria leaf spot emerges as round brown spots in highly humid fields. Crop rotation and airflow prevent it better than chemicals.
Whiptail disorder is not a disease but a molybdenum deficiency that makes leaves narrow and deformed. A small molybdenum spray corrects it rapidly.
Healthy cauliflower fields look bluish-green and firm.
Unhealthy ones look pale, twisted, or thin.
CURD PROTECTION — THE MOST IMPORTANT STAGE
Cauliflower curds are sensitive to sunlight.
Direct sun exposure can cause yellowing or sunburn.
Professional farmers fold outer leaves over the curd when it begins forming—this natural shield protects whiteness and keeps curds tight. Some hybrid varieties self-blanch, meaning leaves naturally cover the curd.
In hotter climates, leaf coverage is essential for perfect curd colour.
Farmers check curds gently—not pressing too hard—to avoid bruising.
HARVESTING
Harvesting cauliflower is a moment of precision.
A mature curd feels firm, the surface is smooth, and the dome shape is consistent. If you lift the outer leaves slightly and see a pure, bright white head, you know the time has come.
If harvesting is delayed, the curd becomes “ricey”—a sign that the individual florets have begun separating. This lowers market value drastically.
Early morning is the best time to harvest.
The curds are naturally cool, holding moisture inside.
Farmers cut the curd along with a few protective leaves.
These leaves reduce damage during handling and improve shelf life.
After harvest, curds are moved into shade immediately.
Sun exposure decreases freshness rapidly.
YIELD — REALISTIC GLOBAL RANGE
Average yield per acre: 2,000–3,000 kg
Good management: 3,500–4,000 kg
Exceptional climate: 4,500+ kg
Hybrid varieties outperform traditional ones significantly.
GLOBAL PRICING (USD)
USA: $1.5–3.0/kg
Europe: $2.0–4.0/kg
Middle East: $1.2–2.5/kg
Asia: $0.4–1.5/kg
Africa: $0.3–1.0/kg
Prices rise sharply in winter and during festival seasons.
PROFIT ANALYSIS — INTERNATIONAL MODEL
Let’s consider a realistic example:
Yield: 3,000 kg
Average price: $1.2/kg
Revenue: $3,600
Cost of cultivation: $900–$1,400
Net profit: $2,200–$2,700 per acre
Premium hybrid growers earn $3,000–$4,000 profit.
In cool climates, farmers take two cycles per year, doubling income.
Annual earnings: $4,500–$8,000 per acre
EXPORT MARKET — HOW CAULIFLOWER TRAVELS THE WORLD
Cauliflower is a major export vegetable in UAE, Qatar, Saudi Arabia, Singapore, Malaysia, Maldives, and Europe.
Export cauliflower must be:
– Pure white
– Compact
– No sunburn
– No riceyness
– Firm and heavy
– Cooled immediately after harvest
– Packed in ventilated cartons
Air shipment keeps curds fresh for 3–7 days.
Refrigerated container shipping works for short distances.
Export price: $2–4/kg consistently.
CONCLUSION
Cauliflower rewards discipline more than anything else.
If a farmer understands moisture, soil, and temperature, cauliflower becomes a dependable business crop.
Its curd formation teaches patience.
Its leaf behaviour teaches timing.
And its market value teaches the true meaning of farming as a profession.
One acre of cauliflower—managed with respect—becomes more than a vegetable field.
It becomes a source of pride, income, and global opportunity for youth farmers.
FAQ
- Why do cauliflower curds turn yellow?
Sun exposure or heat stress; fold leaves to protect curd. - How long does cauliflower take to grow?
55–110 days depending on variety and climate. - Can cauliflower grow in tropical countries?
Yes—during cool winter months or high-altitude zones. - What reduces curd size?
Nutrient imbalance, temperature fluctuations, or irregular irrigation. - Is cauliflower profitable?
Yes—$2,200–$4,000 per acre depending on market. - Can cauliflower be exported?
Absolutely—good post-harvest cooling is essential.
✍️Farming Writers Team
Love farmers Love farming
Read A Next Post 👇
https://farmingwriters.com/one-acre-broccoli-farming-complete-guide/